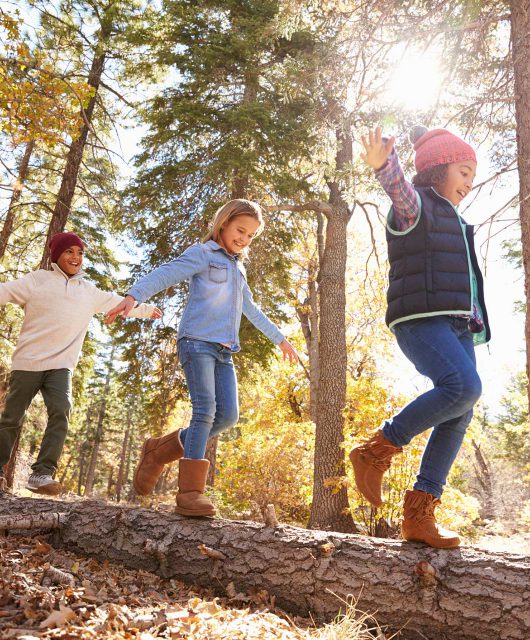
Gardens provide a wonderful environment for children to explore, learn and play.
By gardening together as a family, you can plant the seed of a life-long love of nature, while reaping the many health benefits of being outside!
Check out these hands-on, toddler-friendly activities that invite even the youngest family members outside to get outside and explore! For even more family-friendly outdoor activities, check out our WILD Family Nature Club.
Mud Muffins (18 months+)
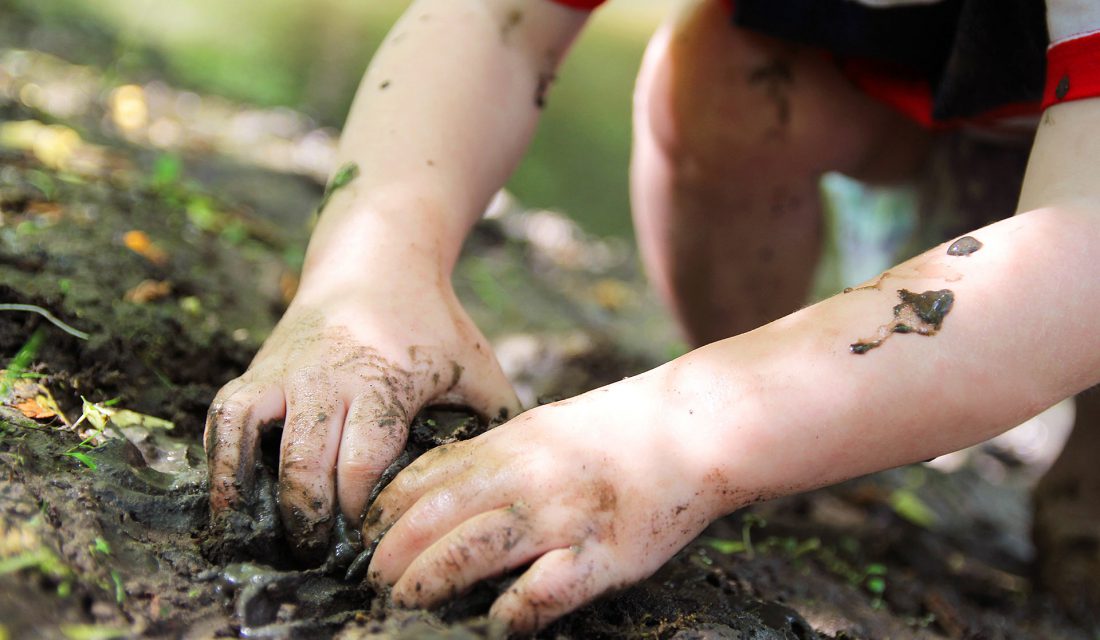 Children love the chance to get mucky! Making mud creations for an afternoon tea party or a muddy monster friend is a fun way to spend time together outside.
This activity is a great way for toddlers to practice fine motor skills while being creative! You can also promote language development by encouraging kids to describe their mud creations and by asking them questions about what they are making along the way.
You will need:
- Muffin tin, ice cube tray or small plastic or metal bowls
- Garden tools or old spoons
- Soil (and water if soil is dry)
- Items found around the garden such as small sticks, cones or flowers
Directions:
- Start with a treasure hunt! Search for a nearby flowers, leaves, sticks, pinecones, pebbles and other loose parts that you will later use to decorate your mud creations.
- Loosen soil with garden tools and help children scoop it into their container with hands, tools or old spoons. If needed, add water to moisten the soil.
- Have kids decorate their muddy creations with items from your treasure hunt or let the soil sit until it is solid enough to remove from the container and then gently decorate it.
- Add another element of fun to the activity by having kids draw their creations or by telling a fun story like Mud Pie Annie by Sue Buchanan.
Blooming Boots (Ages 2+)
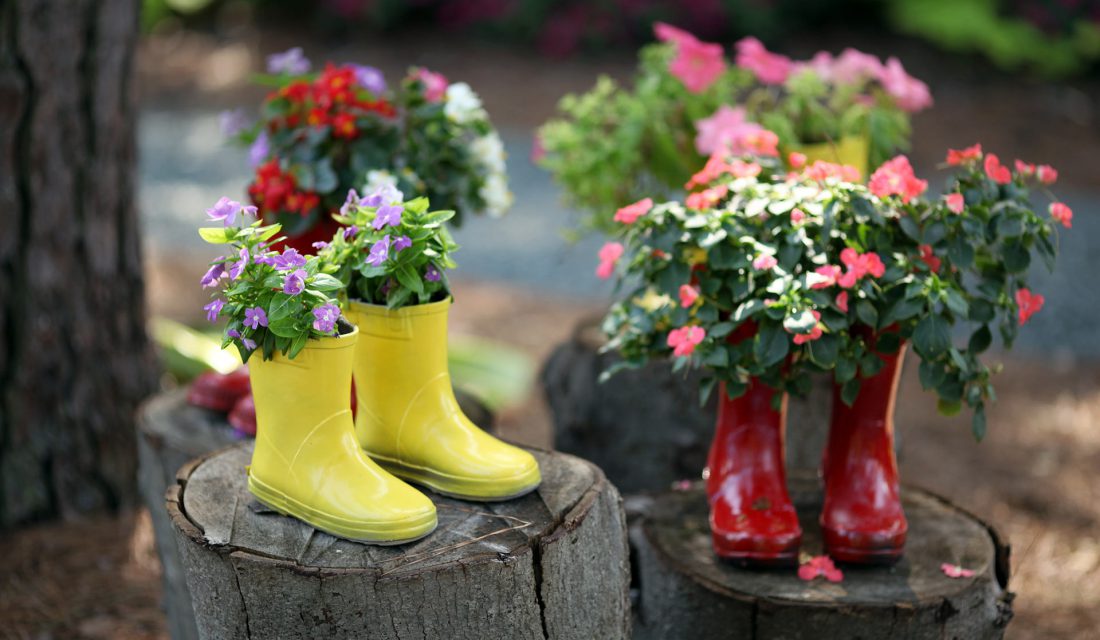 Planting colourful flowers in old rain boots is an activity that can be enjoyed for the whole growing season. Get kids involved in choosing, planting and arranging plants, then watch them grow!
By planting an assortment of colourful flowers and yummy herbs, this fun family project also encourages kids to explore their five senses – sight, hearing, smell, taste and touch.
You will need:
- Drill or hammer and nail
- Old rain boots
- Garden tools
- Soil
- Plants (eg. basil, mint, thyme, strawberries, chives, etc.)
- Water
Directions:
- Using the drill or hammer and nail, put a few small drainage holes in each boot. If you don’t have a pair of old boots handy, search for a fun pair at your local second-hand store!
- Fill the bottom of each boot with soil using a trowel, your hands or a scoop. Leave room at the top of the boot so the water has space to move into the soil rather than spill over the sides.
- Place plants in boots and water them. Cover root ball with soil and lightly water it.
- Put the boots in a location suited to your chosen plants. Be sure to also keep the boots in a place your child can easily reach for touching, tasting (if the plants are edible), smelling and watering.
Framing Fun (Ages 3+)
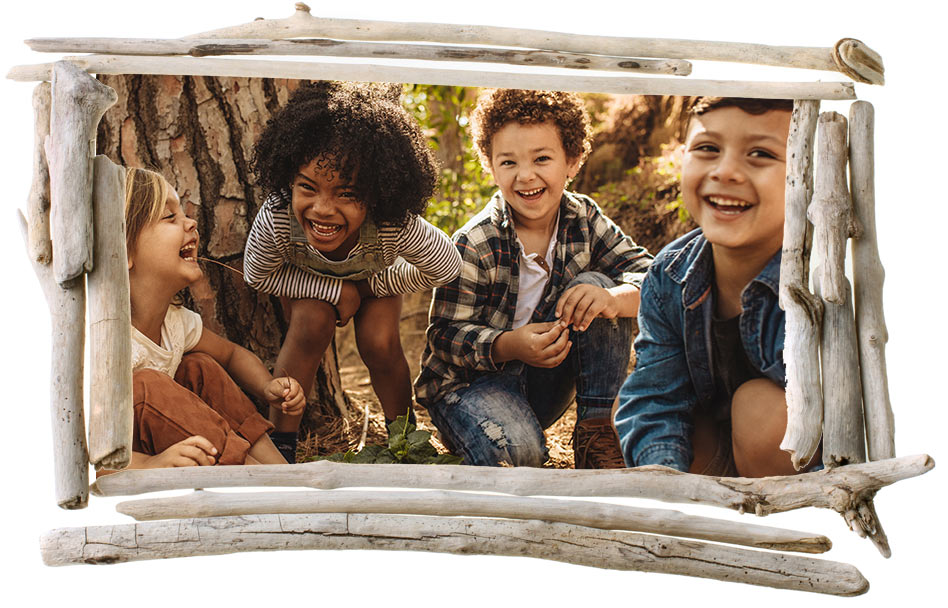 Here’s a chance for your child to create a fun frame for their drawings or photos, or to give as a present, using natural treasures, a tissue box and glue!
Not only will this activity encourage creativity, you can also use it to explore some basic math by having kids count, sort and arrange their decorative items into basic patterns.
You will need:
- Leaves, flowers, seeds, shells, small twigs, etc.
- Wet glue
- Tape
- String
- Scissors
- Tissue box
Directions:
- Cut out the top of the tissue box and widen the opening (enough to see a picture once done). Keep the border wide enough for gluing on some treasures.
- Tape or glue some string on two of the back sides so that it can be hung once finished.
- Glue yours leaves and other natural treasures on the frame and let it dry. The bigger and heavier the item, the more glue you will need to hold it in place and the longer it will need to dry.
- Tape a picture to the back of the frame and hang it on a wall or doorknob! If the child already has a picture to frame, ensure the frame is the correct size so you see the picture and it overlaps just enough to attach at the back of the frame. Make sure your child is okay with the edges being covered.
Learn more about the Canadian Wildlife Federation’s Education & Leadership programming.
Kailey Setter
Kailey is the Experiential Education Manager at the Canadian Wildlife Federation. With over 10 years of experience in conservation and environmental education, she still geeks-out when people ask, “how can I get involved and learn more?”