Spending time outside to play, explore and learn is important.
But if you are looking for a simple, affordable and nutritious way to engage kids with nature in a classroom or kitchen between your outdoor adventures, maybe sprouting is for you.
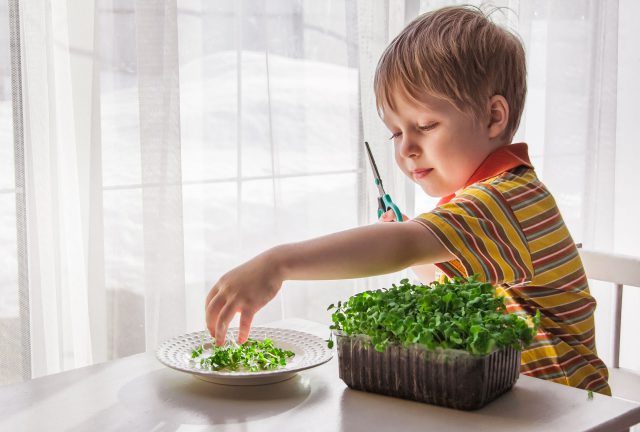
Fresh organic greens are a wonderful thing. Even better if you can grow your own in the comfort of your kitchen or classroom year-round. One option is growing “microgreens” in a tray with soil to harvest the young leaves of plants, like kale and sunflowers, as they first emerge. Microgreens are ready once the plants’ true leaves develop. Don’t be fooled by the first set of leaves that you see on your plant, though. They are called “cotyledons” and look different to the plants’ actual leaves. Another option is to let the plants grow even further and form “baby greens”. A simpler option, called “sprouting”, is to harvest the plant before it gets to either of these stages, just after the seed has germinated (or sprouted). This takes very little space and produces highly nutritious food in just a few days. Sprouting can also be a fun way to engage kids with growing plants, the wonders of nature and help them eat their veggies, too!
Overall concept

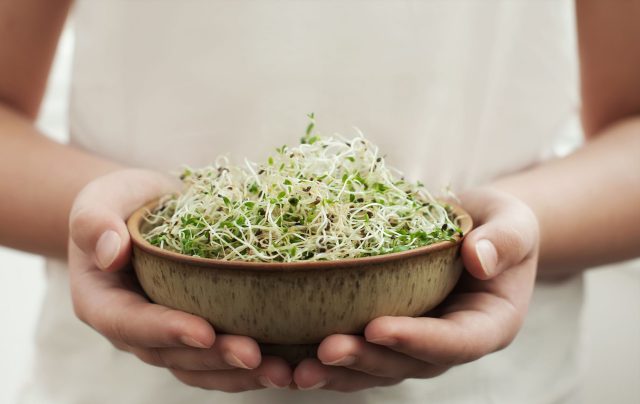
At a glance, the process of sprouting involves soaking the seeds overnight and then keeping them in a container where it is easy to rinse the seeds twice a day. The jar needs to be big enough, keeping in mind that as the sprouts grow, their volume will multiply significantly. After enough days, you will see tiny green leaves form, the plants’ cotyledons, at which point you can stop rinsing and either eat right away or place them in the fridge for later.
Materials

- Seeds to sprout. You can get seeds specifically sold for sprouting at health food stores and online. Look for clover, alfalfa and spicier arugula and broccoli seeds. You may also wish to branch out and try sprouting lentils (whole lentils, not the split red lentils, for example) and beans, like chickpeas and mung beans (like the bean sprouts in Asian cooking!). Some beans are considered harder to sprout, however, and not suitable for eating raw, like kidney beans.
- Either a purchased sprouting kit (there are lots to choose from nowadays!) or assemble the parts yourself: A jar and lid with a screen mesh. Mason jars can work well for this as you can use the part of the top that is the outer rim that screws on to the jar, holding down a mesh that will let air and water flow. Alternatively, you can also use a glass measuring cup (one that holds 2-4 cups is a good size, depending on the volume of sprouts you are growing) with a plastic sieve. See instructions below to decide what suits you best.
- Clean water and sink.
Method

- Measure a spoonful or two of seeds. You will gradually get the hang of how many dry seeds (or beans or lentils) you need for the resulting amount of sprouts you want.
- Place the seeds in a clean jar or dish and add enough water to cover. Let the seeds soak for approximately 10 – 12 hours, changing the water if it looks coloured. If you have a sprouting kit, you may be able to soak the seeds in that.
- Drain and rinse the seeds, then put them in whatever container you have for sprouting. Sprouts don’t need light so you can keep your container on any clean table our countertop. If you don’t have a kit or mason jar, try using a glass measuring cup. Rinse the sprouts two or three times a day and in between rinsing, keep upside down or at an angle to drain away any excess water.There are different ways you can do this and sprouting kits will have some kind of mesh through which you can add and drain the water. If using mason jars, you can prop it at an angle on a dish rack with the tray below to catch any water that drains out. These days you can also buy special stands with trays just for sprouting.If you don’t have a kit or similar set up, you can use a measuring cup to keep the seeds in. When it comes time to rinse and drain, fill the measuring cup with water and then pour the water out with the help of sieve. If any sprouts end up in the sieve you can tap the sprouts back into the measuring cup (it helps to have a sieve that is a similar size to the measuring cup, so it’s easy to not spill any). This does not help with draining the water away in between times, so ensure you drain really well.
- After a few days, you will see growth. At this point, you may need to keep more of an eye on them as they may start to grow through your mesh and get stuck, breaking when you try to remove them. You can avoid this by rinsing more often which dislodges the sprouts before they get too tangled. Beans and lentils can be harvested at this point. Seeds can be as well although many people let them grow until the cotyledons form.TIP: You will see the hulls separate from the seed or bean. This outer layer protects the seed/bean and is considered edible and harmless. But if you wish to remove them, you can try soaking your sprouts and scoop out the hulls that rise to the surface.
- Once ready, you can add to a meal and put the rest in a container in the fridge (or some sprouting kits can go directly in the fridge, as with a mason jar that has a solid lid to replace the outer ring and screen/mesh). Ensure they aren’t too wet, though.
You will likely need to eat them within the week, depending upon how they are packed.
Using your sprouts

You can add sprouts to salads and sandwiches as well as stir-fry’s and soups.
NOTE: Ensure you rinse your sprout seeds and then sprouts well and, while they need to remain moist, avoid excess moisture or they could invite harmful bacteria to grow.


